Tuesday, February 13, 2024

Love and Chocolate


Love and chocolate!  A dynamic duo that fits all types of love and all types of chocolate.  And while I may not be able to make any promises about your love prospects (I'm sure they're fabulous, by the way!), I can promise you all the scrumptious chocolate eats that your heart and palette can hold.


So if you’re looking to make your Valentine’s Day a little sweeter, then I’ve got seven ways to make that happen in this roundup of my favorite chocolate recipes I've shared here over the years.


Choose one (or more) to express your love to those who are special to you and enjoy all the delicious goodness and good vibes that result. From morning to night, and all in between, these sweet treats are the perfect indulgence.


Chocolate Peanut Butter Cups


Chocolate Truffles


Chocolate Hazelnut Bark


Chocolate Croissants


Chocolate Chip and Sea Salt Cookies


Chocolate Sorbet


Raspberry-Topped Chocolate Cake


Here’s to love, chocolate, and Happy Eating!

SHARE:

Sunday, April 30, 2023

Chocolate Hazelnut Bark


Few things tantalize me like chocolate and nuts, combined.  Peanuts, almonds, cashews, hazelnuts--you name it!  It's a forever combination made in heaven for me.

But there's something especially scrumptious about chocolate and hazelnuts.  So when I recently came across a video touting the two in a delicious bark, I knew I had to bring the goodness to life in my own kitchen.  

Following church today, I made good on that promise and a three-ingredient star was born (I added sea salt to finish, in case you're wondering).  It takes sheers minutes to bring together, followed by an hour or so to set in the freezer--and you've got the best noshing at your fingertips.

Whether it's a casual (healthy-ish) sweet fix or a dessert course, it eats (and satiates) all the same.  

Here's to your own batch in your kitchen and guaranteed...Happy Eating!

Chocolate Hazelnut Bark

Ingredients:

6 oz. semi-sweet chocolate

8 oz. hazelnuts

Sea salt to finish (optional)

Method:

Preheat oven to 350 degrees F.  Place hazelnuts in preheated oven and roast for 10-12 min.

Remove roasted hazelnuts and place them in a clean kitchen towel. Using towel, rub skins off of the hazelnuts (don't worry if they don't all come off) and set hazelnuts aside.

Melt chocolate in a double boiler (place a heat-proof bowl over a pot of simmering water, being careful not to allow the bottom of the bowl to touch the water) and stir chocolate until completely melted.  Remove chocolate from heat and stir in hazelnuts.

Pour chocolate-hazelnut mixture onto a parchment lined baking tray.  Sprinkle with sea salt, if using.

Place tray in freezer and allow bark to set, 1-2 hours.

Remove from freezer and enjoy!


SHARE:

Saturday, December 23, 2017

Chocolate Truffles (& A Food Story)

Ten years. TEN YEARS!

I recently came up for air and realized that, indeed, it has been ten years since I first "went public" (read: beyond doting family and friends) with my food passion and journey.  I had been cooking, baking--and sharing--well before then, but ten years ago (the holiday season of 2007, to be exact), I decided to take my love of creating and sharing great food to another level.  And it was then that my inaugural Holiday Sweets and Treats Menu was born.


When I set about this whirlwind task of developing the menu (the easy part--and 100% inspiration) and subsequently fulfilling 35 orders that first Christmas (yes, 35!!!--and more in the queue that I had to decline as the word spread), I didn't have any more immediate plans on this front.  Because let me tell you: that. was. some. work.--100% perspiration.

Still, I took immense pleasure in the fact that people responded to my food--and wanted to pay me for it! (A sensation I imagine most creatives and entrepreneurs experience.)  I made everything from scratch (the purist in me is still alive and well all these years later.)  I had personalized ribbons with my new chosen name, D.M.R. Fine Foods, designed to adorn the delivery boxes.  And, finally, I personally packaged--and delivered--every order to each precious customer across the Metropolitan Atlanta area (the majority of whom were...strangers!)  It was the ultimate labor of love--and one that has brought me to this very moment in time...in grateful retrospection.


This has been one of the best surprises and journeys of my life so far--replete with blessing after continual blessing.  I'm so grateful to God for the gifts and talents He's graced me with and for allowing me to share them with those who cross my path in real life or virtually.  And THE BEST IS YET TO COME!


As an ode to that first menu and the abundant memories, I'm sharing a delicious, indulgent confection that has been with me since that initial launch: my rich Chocolate Truffles.  And because they're so easy to pull together, you can make them now and enjoy them in time for Christmas--and beyond!

Here's to ten years and counting, a Merry Christmas....and, as always, Happy Eating!

Chocolate Truffles
Ingredients:
8 oz. semisweet (good quality) chocolate --some of my favorites are Lindt and Ghirardelli 
1/2 cup heavy cream
1 teaspoon vanilla extract
Confectioner's Sugar
Dutch (Unsweetened) Cocoa 

Method:
Finely chop chocolate and set aside in a heat-proof bowl.  

Add cream to a heavy saucepan and bring to a simmer over medium heat, stirring occasionally.  Stir in vanilla.  Let cool for 20 seconds.

Pour hot cream over chocolate and stir to melt chocolate completely.  (Cook's Note: If chocolate still has lumps, place bowl over a pot of simmering water--being careful that the bowl doesn't touch the water--and continue to stir until the mixture is completely melted and smooth.) 

Refrigerate for at least two hours and then using a small ice cream scoop or teaspoon, scoop out the truffles.  They don't have to perfect; it's meant to be rustic as a mimic to the real (savory) truffles.

To finish, roll truffles in powdered sugar and cocoa (and any other coatings you prefer.)  Serve and enjoy!


SHARE:

Monday, February 13, 2017

Chocolate Peanut Butter Cups

Let's just say that my affinity for chocolate and peanut butter combined knows few, if any, bounds.  From childhood, peanut butter has always been one of my absolute favorite tastes.  (I actually have a family member or two who find it totally distasteful, and every so often I have to insert the incredulous side-eye/eye roll to this madness. 😏) 


As I was saying, PB (with, or without, the J) is a delicacy I find scrumptious from cookies (it's my favorite kind and perpetual "go to"), to candies, and beyond.  And while I'm not the world's biggest chocoholic, chocolate peanut butter cups--or any variation of those ingredients--squarely amount to confectionery delights of the grandest proportions.  Translation: it's not safe to keep them around for long...or my hips and waist may be impacted.

Still, everyone deserves a special indulgence (or two or three or more) every so often.  And these homemade goodies more than fit the bill of indulgent, undeniable goodness.   And served to someone special?  There's no denying the love that's involved.  

So for all my fellow chocolate-peanut butter lovers, this one's for you.

Happy Eating!

Chocolate Peanut Butter Cups
Ingredients:
9 ounces milk or semi-sweet chocolate
3/4 cup smooth, natural peanut butter
1/4 cup confectioner's sugar
1/2 teaspoon vanilla extract
1/2 teaspoon kosher salt

Method:
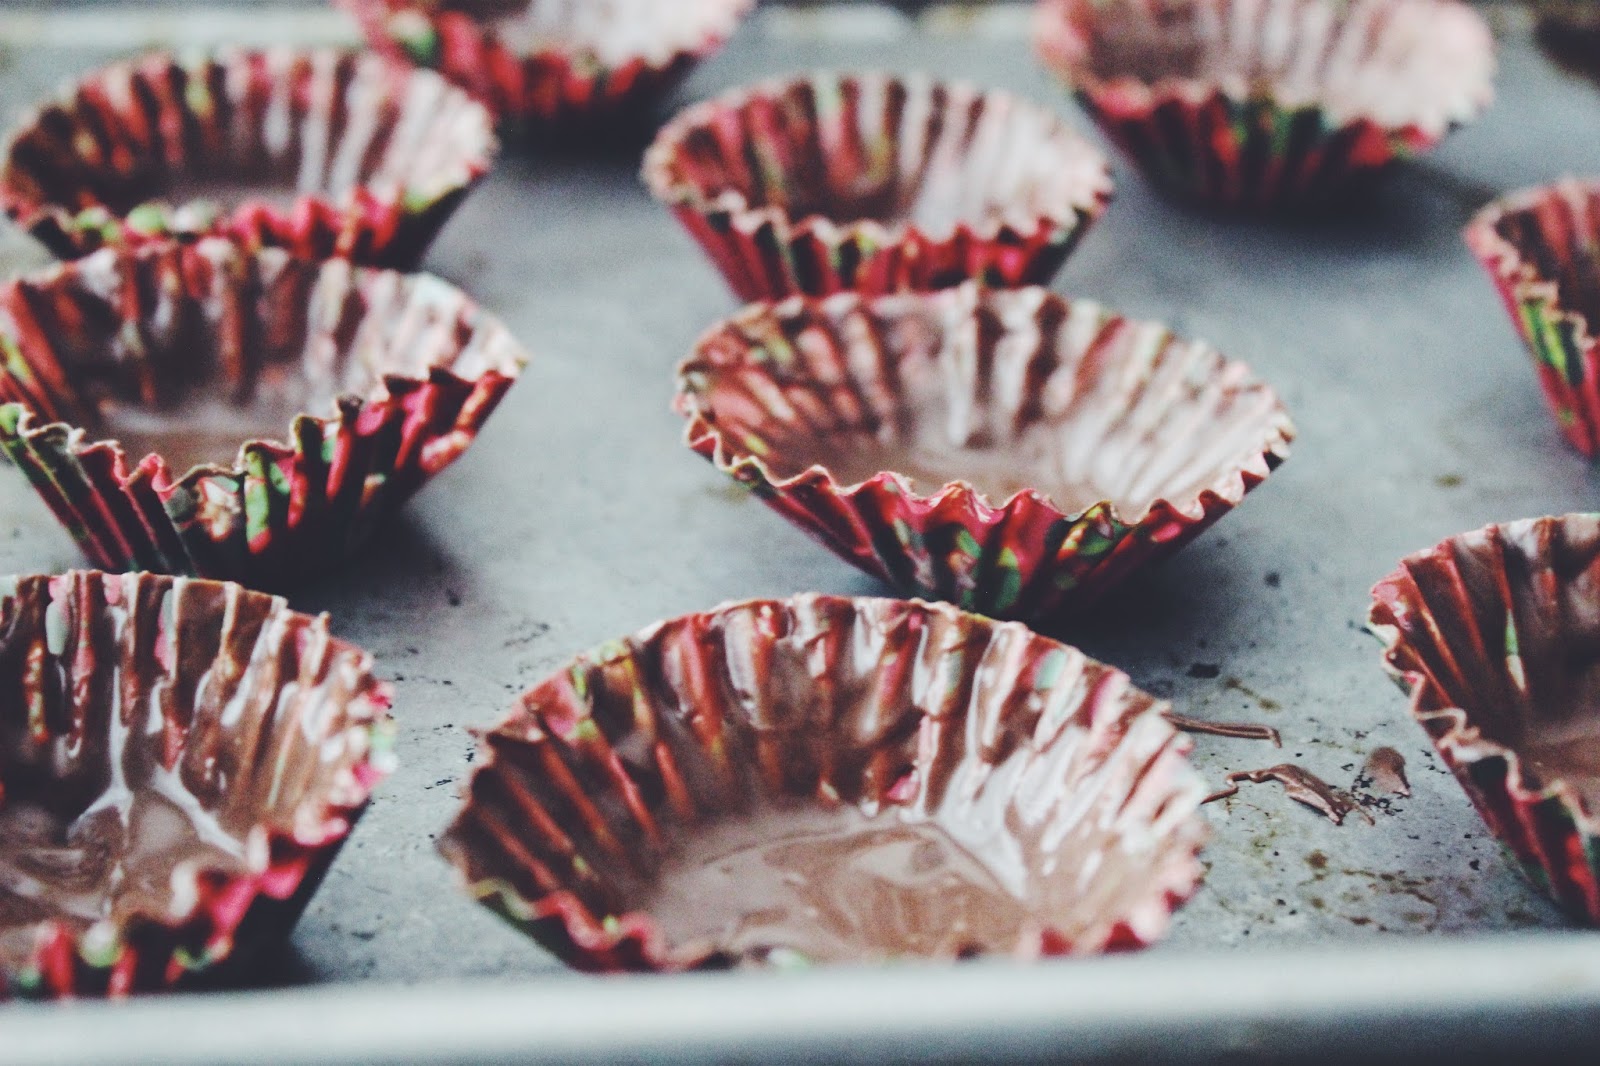
  1. Set 18 mini paper baking cups on a baking sheet. Melt 4 ounces of the chocolate either over a double boiler on the stove top or in short bursts in the microwave. Spoon 1 teaspoon of melted chocolate into each cup. Use an offset spatula or a small spoon to spread the chocolate slightly up the sides of each baking cup; make sure you have an even chocolate base at the bottom of each cup. Let cool at room temperature for about 15 to 20 minutes until mostly solid.
  2. Meanwhile, in a medium bowl, stir together peanut butter, confectioners’ sugar, vanilla extract and salt. (Make sure the peanut butter is well-combined in the jar before you measure it.) Transfer the peanut butter mixture to a resealable plastic bag and seal it tightly.
  3. Cut one corner of the plastic bag and pipe 2 to 3 teaspoons of peanut butter mixture into the center of each cup. With a very lightly moistened finger, tamp down the peanut butter and make it flat and even, but leave a bit of space between the peanut butter and the edge of the paper cup (you should be able to see a ring of chocolate peeking from below the peanut butter).
  4. Melt the remaining 5 ounces of chocolate. Spoon 1 teaspoon of chocolate onto the top of each cup. Use an offset spatula or a small spoon to spread the chocolate evenly over the top and down the sides of the cup. Refrigerate until solid, about 30 minutes.
 Enjoy!
Recipe courtesy of New York Times Cooking
    
SHARE:

Friday, October 3, 2014

Gourmet Popcorn {4 Ways!}


In the world of snacks, there are few that rank higher on my list than popcorn.  I can barely resist being anywhere near the stuff and not indulging.  And I won't even mention what happens each time I enter the concession area of a movie theater (whether I've eaten just before arrival or not).  Let's just say I never leave empty-handed.  Yes, it's like that.

For me, popped corn is wonderfully scrumptious on its own, with a bit of salt (and maybe hot sauce--don't judge me), and needs little more to be enjoyed.   But on the occasion that you're looking to "doctor it up", elevating it from simple bar snack status to something rather unforgettable, an easy gourmet touch is all you need.

From sweet, to savory, and beyond, there's no end to the flavor combinations to be had.  I'm sharing four of my favorites to get you started with scrumptious snacking and....

Happy Eating!

Gourmet Popcorn
When going for "top-shelf" popcorn snacking, I prefer to start by popping my own corn kernels (vs. microwaving).  It's quick and easy and can be done in a matter of minutes on the stove-top or with an air-popper.  I recommend using a neutrally flavored oil like canola, sunflower, or vegetable, and following the packaging instructions for perfectly popped corn!

Cinnamon-Sugar 

1/4 cup sugar
1/2 tablespoon cinnamon
Pinch of salt
Popcorn

Stir or whisk together the sugar, cinnamon and salt.  Sprinkle desired amount over (freshly popped) popcorn and enjoy! Store any extra sugar in an air-tight container.

Garlic-Butter

6 tablespoons unsalted butter, melted
2 tablespoons garlic powder
Generous sprinkling of salt
Popcorn

Stir garlic powder and salt into just-melted butter and drizzle over popcorn. Enjoy!

Chocolate-Nut Mix

1/3 cup chocolate chips 
1/3 cup nuts (almonds, peanuts, cashews, etc.)
Popcorn

Add chocolate and nuts to popcorn and toss to combine.  Enjoy!

Buttered Toffee 

Toffee Sauce
Popcorn

Drizzle toffee over popcorn and toss to coat.  Enjoy!


SHARE:

Thursday, February 13, 2014

Chocolate Croissants


Making croissants from scratch is no small feat.  I learned this first hand last year when I attended a baking class for that very purpose.  It was a multiple hour endeavor filled with lots of learning, technique, precision and, finally, indulging!  But my takeaway (besides the fruits of my labor) was: this is serious work.  And while I'm not one to shy away from something I love because of the effort involved, I can certainly appreciate a well-suited shortcut to get me to my end goal.  And in the case of making croissants in my own kitchen, thankfully, there was such a shortcut to be had.

Keeping my class recipe notes at bay, when I decided to bring the same flaky, buttery deliciousness I love in a good great croissant into being, I went for one of my favorite ingredients: store-bought puff pastry.  I'm a big fan of how easy it is to create both sweet and savory delicacies with it, and I enjoy using it in everything from turnovers to sticky buns to tops for my homemade pot pies and more.  It's an indispensable "star ingredient" when I need good pastry in a relative hurry.

So what could be better than the flaky, buttery goodness I was describing?  The same with chocolate and sea salt tucked inside!  (These days sea salt and chocolate are virtually inseparable in my kitchen.)  With my ingredients at the ready, scrumptious chocolate croissants were waiting to be devoured in a matter of minutes.  And breaking open a croissant to see the melted chocolate oozing on the flaky dough was the icing on top.


Whether you're talking breakfast, breakfast in bed, brunch, or breakfast for dinner, this recipe will have you off to the perfect sweet start--and finish.  It deserves all the love you'll want to give it, and it will definitely love you back.

Happy Eating!

Chocolate Croissants

printable recipe

Ingredients:
1 sheet of puff pastry, thawed and chilled
1 chocolate bar, chopped in small squares, or chocolate chips
Sea Salt
Flour, for dusting the work surface
1 egg, beaten
Turbinado sugar, optional

Method:

Preheat oven to 400 F.

Roll out pastry dough onto a lightly floured surface.  Cut the dough into large squares (6 to 8), then cut each square diagonally to form triangle pieces.  Place the chocolate on the dough closer to the wider end and sprinkle with the salt.  Roll the dough towards the narrow end to seal, being sure to tuck in the overhang.  Round the sides inward to form the crescent/croissant shape.  Brush the croissants with the egg wash and sprinkle with sugar, if using.

Bake for 15-20 minutes, or until golden brown.  Serve warm and enjoy!
SHARE:

Wednesday, September 18, 2013

The Perfect Mix: Chocolate Chip and Sea Salt Cookies

The mix of sweet and salty flavors is about as close to perfection as you can get.  And it has become one of my favorite flavor profiles for everything from brownies to caramels, ice cream, cookies and more.

In fact, I decided to elevate this classic recipe for chocolate chip cookies by adding my favorite sea salt, Fleur de Sel, which adds a perfectly salty under note that lingers on your tongue--in a very good way.  Each time I've baked a batch over the last year, I've made them this way--and there's no turning back.  Scrumptiously sweet and salty, chocolate chips and sea salt, have become the new standard.  And it's the perfect mix!

Enjoy and tell me what are some of your favorite flavor combinations in the comments section below.

Happy Eating!

Chocolate Chip and Sea Salt Cookies

Ingredients: 
1 1/3 cups all-purpose flour
1/2 teaspoon baking powder
1/2 teaspoon baking soda
1 teaspoon Fleur de Sel (or other sea salt), plus more for sprinkling
1/2 cup unsalted butter, at room temperature
1/2 cup granulated sugar
1/2 cup firmly packed light brown sugar
1 large egg
1 teaspoon vanilla extract
1 cup milk chocolate chips

Method:
Preheat the oven to 350 F.   

Sift together the flour, baking powder, baking soda and salt into a bowl and set aside.

Cream together the butter and sugar until fluffy and pale yellow, using an electric mixer.  Add the granulated and brown sugars and continue beating until the mixture is no longer gritty when rubbed between your fingers.  Add the egg and vanilla and beat on low speed until blended.  (Remember to scrape down the the sides of the mixing bowl, as needed.)

Add the flour mixture to the butter mixture and mix on low speed or stir with a wooden spoon just until blended.  Add the chocolate chips, mixing or stirring until just blended.

Using a small ice cream scooper, or a rounded tablespoon, scoop and drop the dough onto baking sheets lined with parchment paper, spacing the cookies about 2 inches apart.

Bake the cookies until golden brown around the edges, about 15 minutes.  When done, sprinkle the tops of the cookies with more fleur de sel.  Let the cookies cool briefly on the baking pans on wire racks before transferring them to the racks to cool completely.  Enjoy!
Recipe adapted from Williams-Sonoma


SHARE:

Tuesday, July 30, 2013

{Sweet Decadence}: Chocolate Sorbet

Dreamy. Indulgent. Scrumptious. Decadent.  Those are just a few of the words that come to mind when describing the frozen treat that I can never get enough of: ice cream!  And this past weekend, I brought an intensely satisfying version to life in my kitchen.

With little more than a few ingredients, and my ice cream maker in tow, I indulged in making an uber-rich, chocolate sorbet.  Because I relish ice cream more than any other dessert--dare I say food--I purposely try to limit its presence in my freezer for obvious reasons.  

But when you're talking homemade sorbet (or gelato or ice cream or any other incarnation of frozen cream), exceptions must be made.  Cocoa, cinnamon, espresso and vanilla are the main flavors that yield this sorbet that is as rich and fudgy and satisfying as any chocolate ice cream I've ever tasted.  And because it wields a potently sweet and chocolate kick, you only need a little to hit the spot (or so I tell myself.)

As the remaining days of Summer unfold, I look forward to enjoying more sweet decadence and hope you will, too.

Happy Eating! 

Chocolate Sorbet

Ingredients:
1 cup sugar
1/2 cup cocoa powder
1/4 teaspoon pure vanilla extract
1/8 teaspoon ground cinnamon
1/8 teaspoon kosher salt
2 cups water
1/4 cup brewed espresso (1 shot)

Method:
In a large saucepan, mix the sugar, cocoa powder, vanilla, cinnamon, and salt. Stir in 2 cups water and the espresso. Cook over low heat until the ingredients are dissolved. Transfer to a container and refrigerate until very cold.

Freeze the mixture in an ice cream machine according to the manufacturer's directions. The sorbet will still be soft; place it in an airtight container and freeze for 1 hour or overnight, until firm enough to scoop.
  Enjoy!
Recipe adapted from Ina Garten

  
SHARE:

Thursday, October 25, 2012

Postcard from Riviera Maya: A Mexican Fiesta + Churros


For me, any vacation that involves sand, ocean and abundant sunshine is like a taste of heaven on earth. And enjoying it amidst a girls' getaway makes it even more special.  That was the scene when I traveled to the Riviera Maya a couple of years ago.  My friend and I had one supreme agenda: R&R.  Hers translated to rest and recreation (horseback riding on the beach, a local tour, roller blading and such); mine stayed true to the more traditional rest and relaxation regimen, heavy with beach, beach and more beach, although I did enjoy a bike ride around the stunning resort grounds, a tour of the main dining kitchen, a casual cooking lesson, a dance lesson here and there, and the nightly (almost karaoke) live band. :)  

And of course, there was the food.  The resort boasted several restaurants specializing in varied cuisines from French to Thai to Italian to American--and their signature Mexican.  As resort food goes, it was pretty good.  


A fun lesson on making guacamole

On our last evening there, however, we were delighted with an authentic Mexican fiesta, replete with gorgeous dancers and Mariachi for entertainment, and a feast to remember.  I enjoyed every minute of the lively celebration and the beautifully displayed foodscape, especially the lavish dessert bar that featured, among other delicacies, churros.  Well, you don't have to guess if I indulged.


While I'm not in Mexico today, this recipe for churros, along with my memories, brings Mexico home to me.  If you love sweet, cinnamon-y, fried pastry dough (who doesn't?!), then you'll want to make these.  And for extra yumminess, pair them with decadent hot chocolate for sipping or melted chocolate for dipping.  So. Good.

Churros!

Happy Eating!

Churros

Ingredients: 
1/4 cup sugar
1/2 teaspoon ground nutmeg
1/3 cup plus 2 tablespoons all purpose flour
1/3 cup water
1 tablespoon butter
1/4 teaspoon grated orange peel
Pinch of salt
1 egg
Vegetable oil (for deep frying)

Method:
Combine sugar and ground nutmeg. Spread on plate.

Combine flour, water, butter, orange peel and salt in medium saucepan. Stir constantly over low heat until dough forms ball and leaves film on bottom of pan, about 2 minutes. Remove from heat. Transfer to processor. Blend in egg.

Heat oil in deep skillet to 350°F. Spoon batter into pastry bag fitted with 1/4-inch star tip. Working in batches, pipe batter onto oil in about 4-inch-long ribbons. Fry until golden brown, turning occasionally, about 3 minutes. Transfer to paper towels and drain. Turn churros in sugar mixture and serve.
Recipe Courtesy of Epicurious.com


SHARE:

Tuesday, January 31, 2012

Raspberry-Topped Chocolate Cake (Redux)

Raspberry-Topped Chocolate Cake
After quite some time, here I am again sharing on one amazing recipe that will have bakers--and eaters alike--jumping for joy.  The first time I featured this confection, I shared my inspiration behind baking this recipe and my sheer bliss at the final, beautiful and scrumptious results.  It was my second or so blog post on DMRFF, and I had a tendency to keep it rather minimal in those days, so much so, in fact, that I didn't even include the recipe! I'll just say the inspiration factor was in higher gear than the traditional recipe sharing on that day. (Smile.)

After receiving great feedback, both on and offline, about this beaut, I knew I had to complete the circle and finally share the accompanying recipe for all those who love to bake and/or devour cake as much as I do.

Decadent Chocolate Cake Layer


Baker's Note:  It will require a generous bit of time from start to finish, so plan for when you have some leisure time to spare.  Then enjoy the stimulating escapade of bringing this decadent, rich, chocolaty dream to life in your kitchen.  Finally, finish with the perfect adornment of "snow-capped" raspberries and tell me what's not to love?!

And now, as promised, the recipe, courtesy of Bon Appetit.

Happy Eating!


SHARE:

Wednesday, December 28, 2011

When Food Speaks for Itself: Eye Candy


Wouldn't you like to sink your teeth into these beautiful, dreamy chocolates?! I would!

Happy National Chocolate Day!
SHARE:

Saturday, February 26, 2011

All About Chocolate

I started today in the world of all things chocolate.  Not a bad way to start, for sure.  The occasion was a networking/social affair with several ladies from my corporate gig.  And when I received the invite, I knew I'd be down for checking out a local chocolatier, while connecting with new and old colleagues, alike.  (Note: it doesn't take much to get me interested in most things involving the world of food.)

Chocolate Bark, Candy Mold & Truffles!
So, as planned, we met at the quaint and cozy venue, Chamberlain's Chocolate Factory, and dove into the fun and always fascinating world of chocolate.  We were introduced to the chocolates of the day (white, milk, semisweet (56%) and bittersweet (72%)) by way of scrumptious samples.  This allowed us to acquaint our palettes, so to speak, with the flavors we'd want to use--and possibly reuse or mix--throughout our various chocolate "projects".  Personally, I loved them all, but tended to lean towards my long-standing favorites of milk and semisweet.

Chocolate-Dipped Strawberries
We had the place all to ourselves for a morning of uninterrupted candy-making and didn't waste any time diving into the action.  We started off by painting molds with colorful chocolates, which were then filled with our choice(s) of the white, milk, semisweet or bittersweet varieties.  We followed with chocolate bark, chocolate dipped strawberries and chocolate truffles.  It was chocolate, chocolate and more chocolate! 
I chose my favorite: the butterfly mold
Besides the fun of making the delicacies, while "tasting" my way through the morning, one of the best parts was the ease of it all.  Unlike when I make my chocolate fare at home, there was no having to chop or measure or make the ganache for the truffles or temper the chocolate for the strawberries--or anything else.  It was all ready to go for us to simply enjoy.  Now if I could only find a way to duplicate that in my kitchen.

Some more highlights:
One of the instructors prepares the ganache


So, if you're looking to indulge your sweet tooth, while trying something fun and different, I'd recommend planning an outing.  It would be great for a fun girls' night out, kids' parties and any other occasion you want to tag for the fun of it.  And if all else fails, you really don't need an excuse when it comes to chocolate.  It pretty much speaks for itself.

Happy Eating! 
SHARE:

Monday, August 16, 2010

Raspberry-Topped Chocolate Cake

This past weekend, I took to my kitchen for one of my favorite things:  baking.  The inspiration was to try out some new cake pans and play around with different sized layers, etc.  But, alas, while flipping through one of my Bon Appetit issues, I came across the most beautiful chocolate cake and knew I had to bake this one! 

Creative juices flowing, I started my Saturday morning excited about the creation to come.  It was a wonderful time, as usual, bringing what I consider to be a 'work of art' to life.  Moist chocolate layers, raspberry filling, rich chocolate ganache and snow-capped, fresh raspberries.  I just had to share....  Happy Eating!

Raspberry-Topped Chocolate Cake
SHARE:
© D.M.R. Fine Foods. All rights reserved.
MINIMAL BLOGGER TEMPLATES BY pipdig